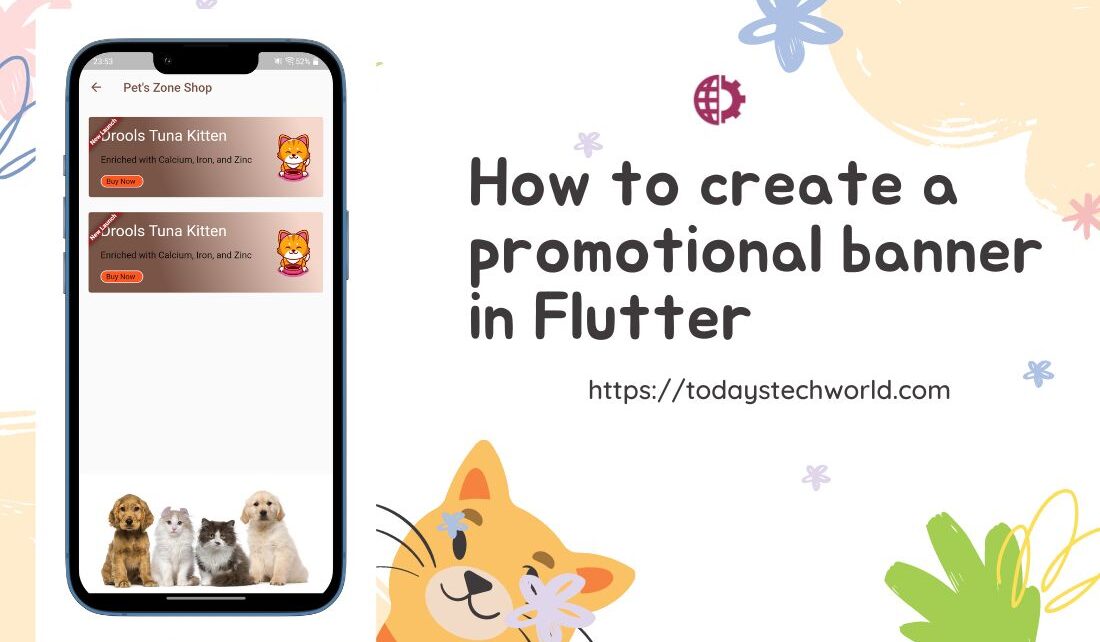
Here we will discuss how to create a beautiful promotional banner in Flutter for the Android and iOS apps. There are many ways to do it. I prefer to make this promotional banner in Flutter using combinations of the banner widgets, containers, color gradients, and an appropriate image. You can see the end result in the featured image of this post or even below a couple of paragraphs.
Creating a promotional banner in Flutter is a creative job that requires your basic knowledge of Flutter, and an understanding of UI design. Here are the steps to create a promotional banner in a flutter.
Important Read: 20 Best App Review Sites to Submit Your App
Contents
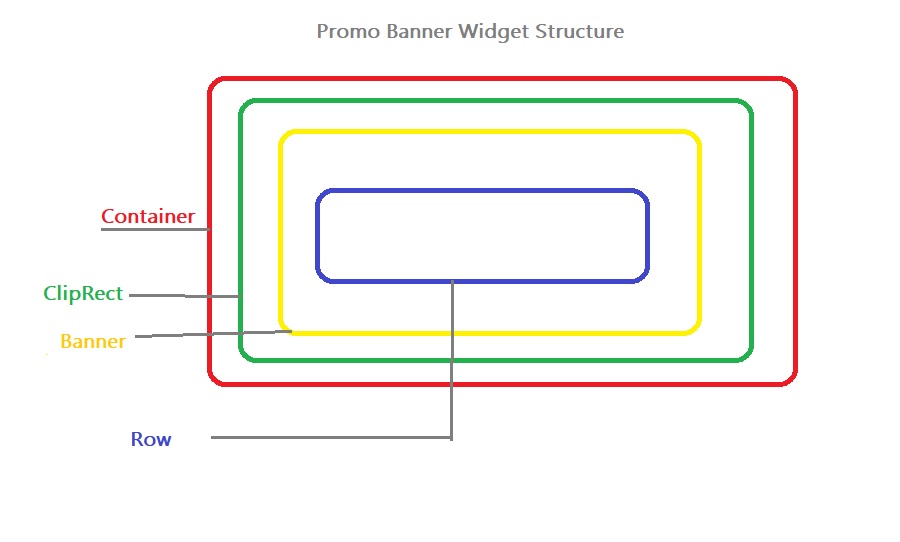
- Create a container to wrap the promotional banner with BoxDecoration
- Add a ClipRect widget as a child to clip off the part of the overflowing banner
- Add a Banner widget as a child to put the promo label
- Add the Row widget as a child which contains the promotional banner message, image, etc.
Here is what the widget structure looks like. This might help you understand how we are going to code this promotional banner in Flutter.
If you have read our previous article on how to create Flutter Login pages or top flutter packages for better UI design then you must be aware that we are creating an app for online pet shopping. In this example, we will be creating a promotional banner in Flutter for one of the Cat’s foods products. Here is the final look-
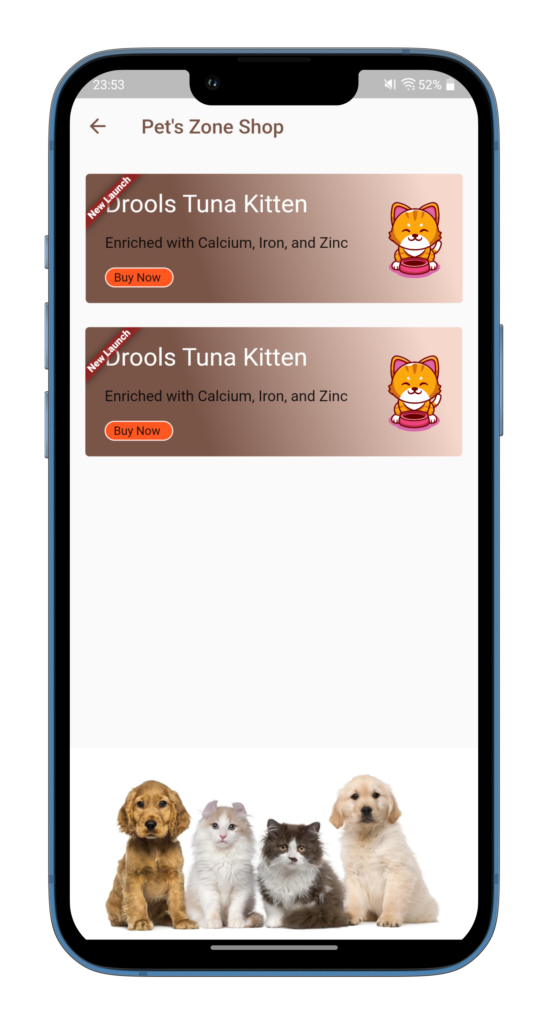
Since we are focusing on just how to create a promotional banner in Flutter so we will directly start with the actual banner code (rather complete page code from scratch).
So, we will create the container with the expected height and width (usually a few pixels lesser than the complete width), and box decoration to create a boxy look with a gradient background. Here is the code-
Container(
    margin: EdgeInsets.only(left: 8, right: 8),
    height: 130,//Height of your promo-banner
    width: MediaQuery.of(context).size.width - 16,
    decoration: BoxDecoration(
      borderRadius: BorderRadius.circular(4),
      gradient: const LinearGradient(
        colors: [
          Colors.brown,
          Color.fromARGB(255, 245, 215, 204),
        ],
        begin: Alignment.bottomLeft,
        end: Alignment.topRight,
        stops: [0.3, 0.9],
        tileMode: TileMode.repeated,
      ),
    ),
)
2. Add a ClipRect widget as a child of the container
A ClipRect widget helps clip off the part of the UI overflowing the container. May sound confusing but here is the explanation. When you create a promotional banner in Flutter a part of the banner ribbon goes out of the container as shown below screenshot and to overcome this we use the ClipRect widget.
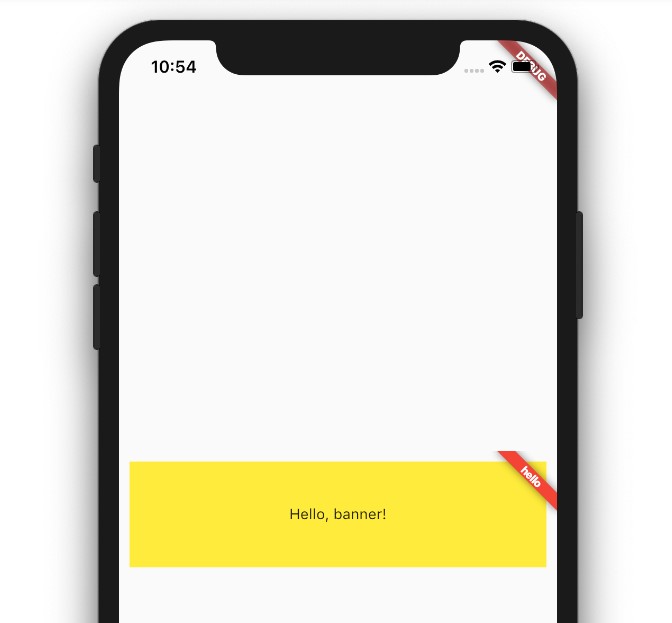
This is well explained in this StackOverflow discussion.
Here is the syntax-
Container(
 child ClipRect()
),
3. Add a Banner widget as a child to put the promo label
Our next step is to put the banner label (for the previous screenshot it is ‘hello’). We will be putting a message called ‘New Launch’. If you are following our flutter development blog then you must be aware of our Pet’s Zone project (a mobile app for pet shopping).
Here is the code after we put the promotional banner message, “New Launch”-
Container(
    margin: EdgeInsets.only(left: 8, right: 8),
    height: 130,//Height of your promo-banner
    width: MediaQuery.of(context).size.width - 16,
    decoration: BoxDecoration(
      borderRadius: BorderRadius.circular(4),
      gradient: const LinearGradient(
        colors: [
          Colors.brown,
          Color.fromARGB(255, 245, 215, 204),
        ],
        begin: Alignment.bottomLeft,
        end: Alignment.topRight,
        stops: [0.3, 0.9],
        tileMode: TileMode.repeated,
      ),
    ),
	child: ClipRect(
        child: Banner(
            message: "New Launch",//promotion message
            location: BannerLocation.topStart, //location of message on container
		),
	)
)Now we need to go to the 4th level of the widget tree and create the actual banner Row. This Row widget should have a column of the texts and messages related to the promotional banners in the Flutter app and an image to represent your product. Like the below image –
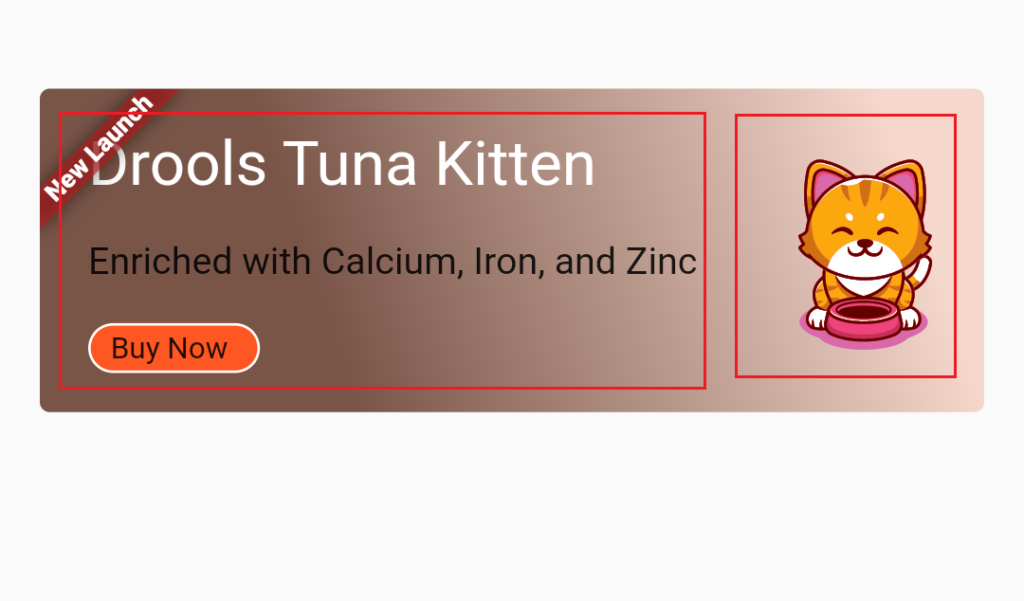
Here is the complete code-
Container(
    margin: EdgeInsets.only(left: 8, right: 8),
    height: 130,//Height of your promo-banner
    width: MediaQuery.of(context).size.width - 16,
    decoration: BoxDecoration(
      borderRadius: BorderRadius.circular(4),
      gradient: const LinearGradient(
        colors: [
          Colors.brown,
          Color.fromARGB(255, 245, 215, 204),
        ],
        begin: Alignment.bottomLeft,
        end: Alignment.topRight,
        stops: [0.3, 0.9],
        tileMode: TileMode.repeated,
      ),
    ),
	child: ClipRect(
        child: Banner(
            message: "New Launch",//promotion message
            location: BannerLocation.topStart, //location of message on container
			child: Row(
                mainAxisAlignment: MainAxisAlignment.spaceAround,
                children: [
                  Column(
                    mainAxisAlignment: MainAxisAlignment.spaceEvenly,
                    crossAxisAlignment: CrossAxisAlignment.start,
                    children: [
                      Text(
                        "Drools Tuna Kitten",
                        style: TextStyle(color: Colors.white, fontSize: 25),
                      ),
                      Text(
                        "Enriched with Calcium, Iron, and Zinc",
                        style: TextStyle(fontSize: 15),
                      ),
                      Container(
                          decoration: BoxDecoration(
                              color: Colors.deepOrange,
                              border: Border.all(
                                color: Colors.white!,
                              ),
                              borderRadius:
                                  BorderRadius.all(Radius.circular(20))),
                          child: Padding(
                            padding: const EdgeInsets.only(
                                left: 8, right: 8, top: 2, bottom: 2),
                            child: Text(
                              "Buy Now ",
                              style: TextStyle(fontSize: 12),
                            ),
                          )),
                    ],
                  ),
                  Lottie.asset("lib/assets/cat.json", height: 80)
                ],
              ),
           ),
      )
)
You can even create a method so that you can just pass the parameters and create different promotional banners in Flutter for your mobile app.
Another easy way (but not as flexible as our method)
We can create a promotional banner in Flutter using an existing package called flat_banner. Let’s discuss how to implement a promotional banner in Flutter using the flat_banner package, and the advantages, and disadvantages of this method.
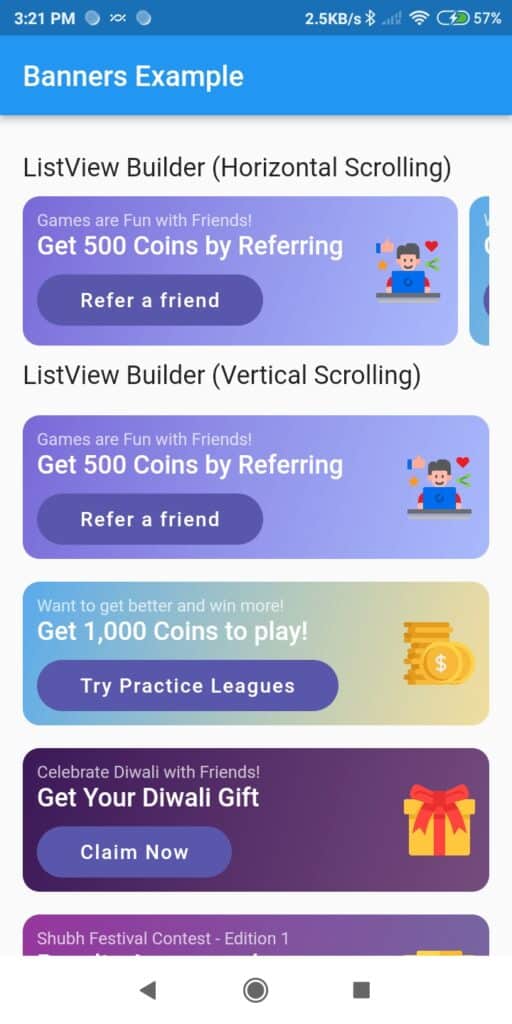
It is very simple to use. All you have to do is install the plugin, import the plugin in your dart file, and use the below code-
FlatBanners(
	imageWidth: 50,//width of the right side image
	gradientColors: [
		const Color(0xff6C59D4).withOpacity(0.9),
		const Color(0xff869DFB).withOpacity(0.7),
	],
	title: 'Drools Tuna Kitten',
	subtitle: 'Enriched with Calcium, Iron and Zinc',
	btnText: 'Buy Now',
	image: 'assets/icons/cat.png',
	onPressed: () {},
),Although it is very simple to use this package however there are many limitations. For starters, you can’t change the image type. For example, you can’t use lottie animations in place of images.
Another disadvantage is that you can’t do many customizations. For example, you can’t add a banner ribbon as we have added in the previous method. Similarly, you can’t add any more text or images as you are confined to using the defined template to create your promotional banner which is not always good.
I would always recommend using the previous method to have more flexibility and many additional options to decorate the banner.
Final Thoughts
Creating a mobile app that is user-friendly and attractive is a challenging job. While Flutter is just 5 years old it has evolved enough to create challenging designs and perform challenging tasks that we couldn’t imagine just a few months back. Hope you loved our article on creating a promotional banner in Flutter mobile app. Let us know your thoughts.
