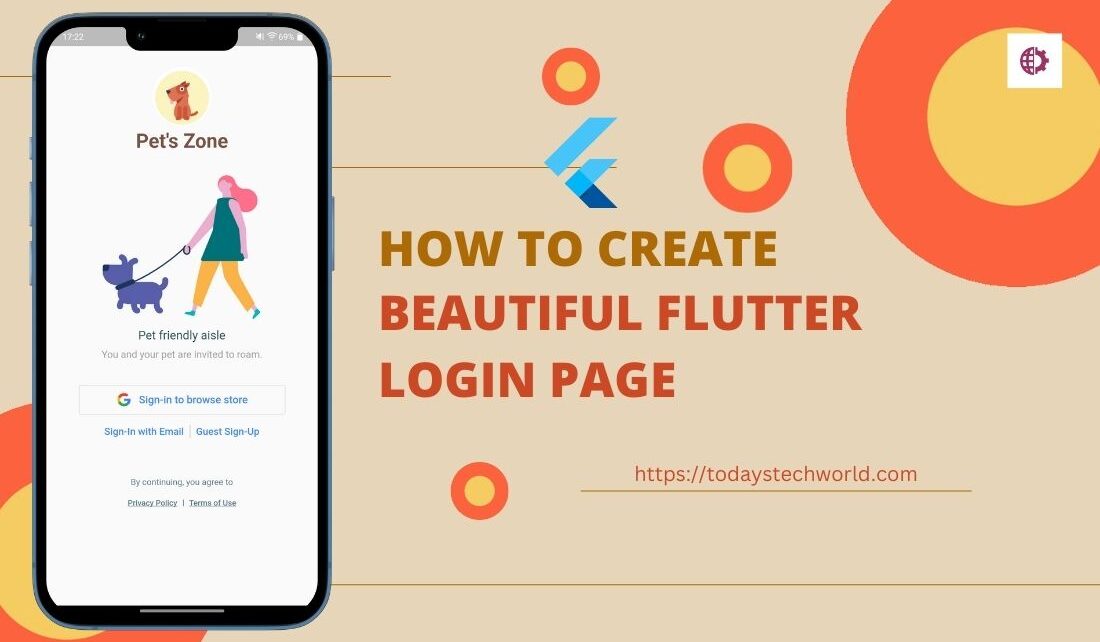
Here we will discuss how to create a beautiful flutter login page (user onboarding page) for the Android/iOS app. We will also discuss design strategies to follow while creating a Flutter login page, how to arrange widgets properly, and most importantly how to code it.
In one of the previous articles, we discussed Dart/Flutter Packages for Better App UI Design. In this article, we will be utilizing one of the packages, Lottie, along with a few other packages to create a beautiful Flutter login page for a pet store.
Contents
- 1 Steps to design a beautiful Flutter login page example
- 1.1 Install the required packages
- 1.2 Create a dart page with the name myPetStoreLoginPage.dart
- 1.3 Create a SingleChildScrollView to show all the widgets used in the flutter login page
- 1.4 Create logo and app name placeholder
- 1.5 Create infographic carousel
- 1.6 Create a Google Sign-In button
- 1.7 Create Email and Guest Sign-In buttons
- 1.8 Create Terms of Use and Privacy Policy link buttons
- 2 Closing thought
Steps to design a beautiful Flutter login page example
I am going to divide the content into bullet points and then I will describe every point in detail. So, here are the steps to create a beautiful flutter login screen-
- Install the required packages
- Create a dart page with the name myPetStoreLoginPage
- Create a SingleChildScrollView to show all of your login page widgets
- Create Logo Container
- Create a brief infographic carousel
- Create Google Sign-In Button
- Create Email Sign-In and Guest Sign-In button
- Create Terms of Use and Privacy Policy links
Install the required packages
We need at least three packages to design this flutter login page. These packages are-
1. Material Package –
Run the below command to add the package to your project-
Package Directory> flutter pub add material
Or you can simply add this line in pubsec.yaml file under dependencies-
material: ^1.0.0+22. Lottie Package –
Run the below command to add the package to your project-
Package Directory> flutter pub add lottie
Or you can simply add this line in pubsec.yaml file under dependencies-
lottie: ^2.0.03. carousel_slider Package-
Run the below command to add the package to your project-
Package Directory> flutter pub add carousel_slider
Or you can simply add this line in pubsec.yaml file under dependencies-
carousel_slider: ^4.2.1Also Read: 10 Best Mobile App Prototyping Tools for Better UI/UX Design
Create a dart page with the name myPetStoreLoginPage.dart
In this step, we will create a blank flutter login page and add the class SignInPage (stateful or stateless as per your future needs. I am making it stateful). Next, we will import packages that we installed to use on our flutter login page. Here is how it should look-
import 'package:flutter/material.dart';
import 'package:lottie/lottie.dart';
import 'package:carousel_slider/carousel_slider.dart';

class SignInPage extends StatefulWidget {
  @override
  _SignInPageState createState() => _SignInPageState();
}

class _SignInPageState extends State<SignInPage> {

}
Create a SingleChildScrollView to show all the widgets used in the flutter login page
Now let’s add a structure bone. We want a single-page scroll view that will contain all the widgets like logo container, introductory lottie image carousel, login buttons, and privacy policy-related options. Here is what your page should look like –
import 'package:flutter/material.dart';
import 'package:lottie/lottie.dart';
import 'package:carousel_slider/carousel_slider.dart';

class SignInPage extends StatefulWidget {
  @override
  _SignInPageState createState() => _SignInPageState();
}

class _SignInPageState extends State<SignInPage> {
  @override
  Widget build(BuildContext context) {
    return Scaffold(
      body: SingleChildScrollView(
        child: Column(
          children: [
            returnLogo(),//displays logo
            returnAppName(),//displays app name, Pet's Zone
            returnPetStoreIntroduction(), //Display image carousel of different
                                          features that your app offers
            returnGoogleSignInButton(), //returns Google Sign in button
            returnOtherLoginOptionsButton(), // displays other sign-in options -
                                             Email sign-ip and guest sign-ip
            returnTermsOfUseAndPrivacyPolicyButton(),//Shows terms of use and
                                                      privacy policy button
          ],
        ),
      ),
    );
  }
}
Also Read: 10 Best Mobile App Mockup tools
Create logo and app name placeholder
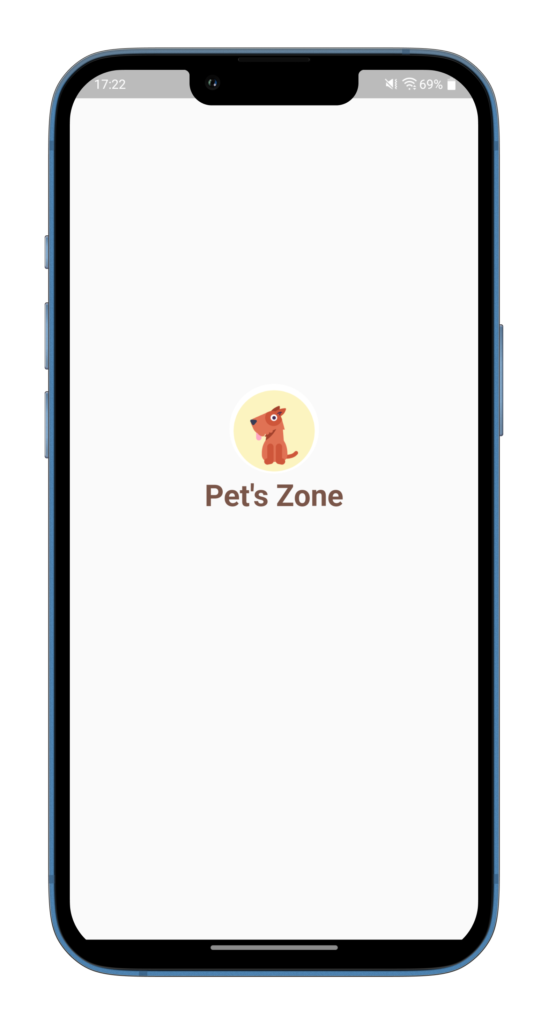
Here are the returnLogo and returnAppName methods. Make sure you include the logo in your project and put the right URL.
returnLogo() {
    return Padding(
      padding: const EdgeInsets.only(top: 60, bottom: 5),
      child: CircleAvatar(
        radius: 45,
        backgroundColor: Colors.white,
        backgroundImage: AssetImage("assets/pet_logo.png"),
      ),
    );
  }

  returnAppName() {
    return Column(
      children: [
        Column(
          mainAxisAlignment: MainAxisAlignment.center,
          children: const [
            Text(
              "Pet's Zone",
              style: TextStyle(
                  fontSize: 30,
                  fontWeight: FontWeight.bold,
                  color: Colors.brown),
            ),
          ],
        ),
      ],
    );
  }
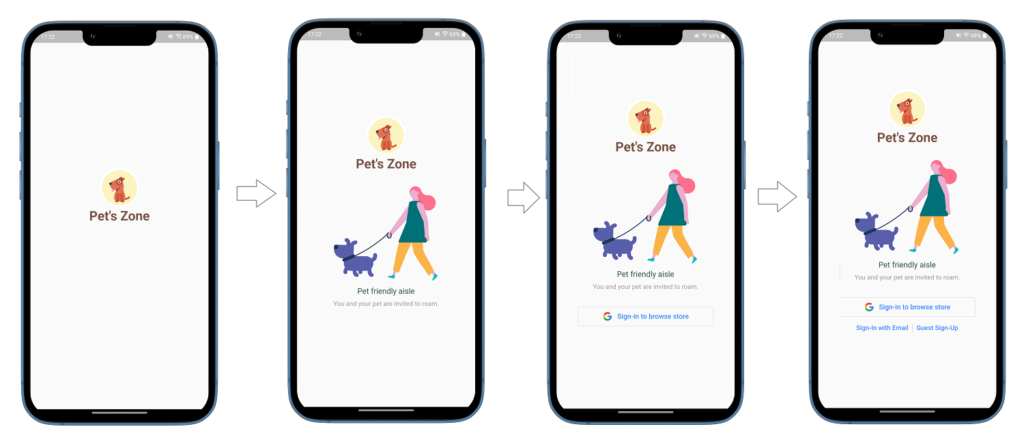
Here is what it should look like –
Create infographic carousel
In the very first step, we installed the carousel_slider package in our project. This package will be used to create a carousel of infographics content (lottie animations and introductory texts).
To implement this section we will have to define a widget list variable that will go as input to carousel_slider and contain 5 widgets of lottie and text.
//Collection of widgets for introduction
  final List<Widget> imgList = [
    Padding(
      padding: const EdgeInsets.only(
        right: 25.0,
        left: 25,
      ),
      child: Column(
        mainAxisAlignment: MainAxisAlignment.center,
        crossAxisAlignment: CrossAxisAlignment.center,
        children: [
          Lottie.network(
              'https://assets9.lottiefiles.com/packages/lf20_pi5ctutg.json',
              height: 230),
          Container(
            alignment: Alignment.center,
            padding: EdgeInsets.only(top: 10),
            child: Text(
              "Got a cute Dog?",
              style: TextStyle(
                fontSize: 18,
                color: Color.fromRGBO(51, 87, 85, 1),
              ),
            ),
          ),
          Container(
            alignment: Alignment.center,
            padding: EdgeInsets.only(top: 10),
            child: Text(
              "We are all about Dogs.",
              style: TextStyle(
                fontSize: 15,
                color: Colors.grey[500],
              ),
            ),
          ),
        ],
      ),
    ),
    Padding(
      padding: const EdgeInsets.only(
        right: 25.0,
        left: 25,
      ),
      child: Column(
        mainAxisAlignment: MainAxisAlignment.center,
        crossAxisAlignment: CrossAxisAlignment.center,
        children: [
          Lottie.network(
              'https://assets9.lottiefiles.com/packages/lf20_Q1pZ8v.json',
              height: 230),
          Container(
            alignment: Alignment.center,
            padding: EdgeInsets.only(top: 10),
            child: Text(
              "Pet friendly aisle",
              style: TextStyle(
                fontSize: 18,
                color: Color.fromRGBO(51, 87, 85, 1),
              ),
            ),
          ),
          Center(
            child: Container(
              alignment: Alignment.center,
              padding: EdgeInsets.only(top: 10),
              child: Text(
                "You and your pet are invited to roam.",
                style: TextStyle(
                  fontSize: 15,
                  color: Colors.grey[500],
                ),
              ),
            ),
          ),
        ],
      ),
    ),
    Padding(
      padding: const EdgeInsets.only(
        right: 25.0,
        left: 25,
      ),
      child: Column(
        mainAxisAlignment: MainAxisAlignment.center,
        crossAxisAlignment: CrossAxisAlignment.center,
        children: [
          Lottie.network(
              'https://assets9.lottiefiles.com/packages/lf20_7olks2Nw7M.json',
              height: 230),
          Container(
            alignment: Alignment.center,
            padding: EdgeInsets.only(top: 10),
            child: Text(
              "All Accessories availble",
              style: TextStyle(
                fontSize: 18,
                color: Color.fromRGBO(51, 87, 85, 1),
              ),
            ),
          ),
          Center(
            child: Container(
              alignment: Alignment.center,
              padding: EdgeInsets.only(top: 10),
              child: Text(
                "Get all accessories including SOS",
                style: TextStyle(
                  fontSize: 15,
                  color: Colors.grey,
                ),
              ),
            ),
          ),
        ],
      ),
    ),
    Padding(
      padding: const EdgeInsets.only(
        right: 25.0,
        left: 25,
      ),
      child: Column(
        mainAxisAlignment: MainAxisAlignment.center,
        children: [
          Lottie.network(
              'https://assets9.lottiefiles.com/private_files/lf30_vwjw9biy.json',
              height: 230),
          Container(
            alignment: Alignment.center,
            padding: EdgeInsets.only(top: 10),
            child: Text(
              "Cartified Pet Food",
              style: TextStyle(
                fontSize: 18,
                color: Color.fromRGBO(51, 87, 85, 1),
              ),
            ),
          ),
          Center(
            child: Container(
              alignment: Alignment.center,
              padding: EdgeInsets.only(top: 10),
              child: Text(
                "Pet food available for all the pets you got.",
                style: TextStyle(
                  fontSize: 15,
                  color: Colors.grey,
                ),
              ),
            ),
          ),
        ],
      ),
    ),
    Padding(
      padding: const EdgeInsets.only(
        right: 25.0,
        left: 25,
      ),
      child: Column(
        mainAxisAlignment: MainAxisAlignment.center,
        children: [
          Lottie.network(
              'https://assets10.lottiefiles.com/packages/lf20_q3mlcaak.json',
              height: 230),
          Container(
            alignment: Alignment.center,
            padding: EdgeInsets.only(top: 10),
            child: Text(
              "Get pet toys",
              style: TextStyle(
                fontSize: 18,
                color: Color.fromRGBO(51, 87, 85, 1),
              ),
            ),
          ),
          Center(
            child: Container(
              alignment: Alignment.center,
              padding: EdgeInsets.only(top: 10),
              child: Text(
                "Get all the pet toys that helps you connect.",
                style: TextStyle(
                  fontSize: 15,
                  color: Colors.grey,
                ),
              ),
            ),
          ),
        ],
      ),
    ),
  ];
Now let’s create the pet store introduction carousel_slider method that will display all these 5 items that we just defined in the imgList variable. The carousel_slider package used here will make our Flutter login page beautiful and help users understand what our app is about.
returnPetStoreIntroduction() {
    return Container(
        margin: EdgeInsets.only(
          bottom: 10,
        ),
        child: CarouselSlider(//Create a carousel of widgets
          options: CarouselOptions(
            height: 340,
            enlargeCenterPage: true,
            scrollDirection: Axis.horizontal,
            autoPlay: true,
            autoPlayInterval: Duration(seconds: 5),
            autoPlayAnimationDuration: Duration(milliseconds: 3000),
          ),
          items: imgList
              .map((item) => Container(
                    child: Center(child: item),
                  ))
              .toList(),
        ));
  }
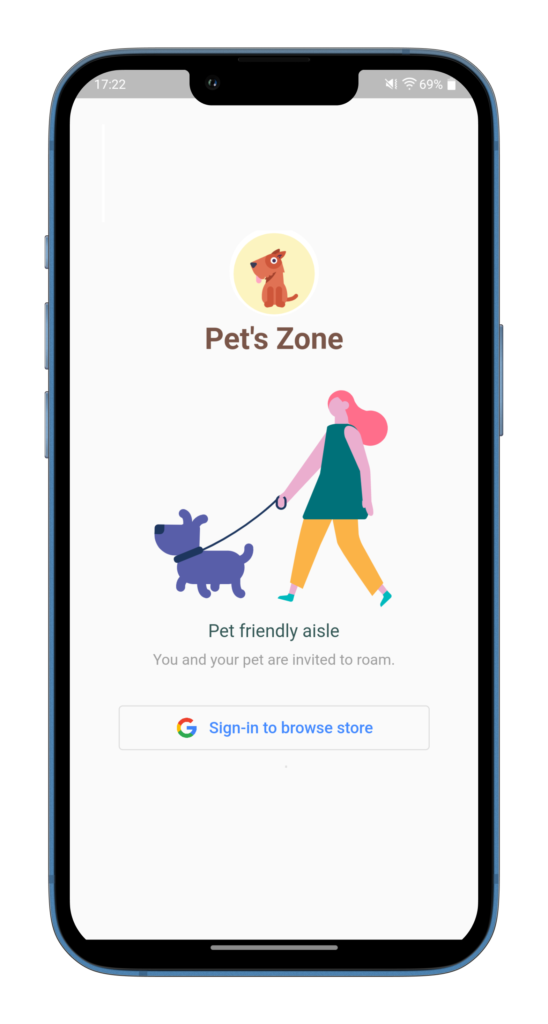
Here is what the Flutter login page will look like (Since it is just an image so you can’t see the animation)-

To create a Google Sign-In button we will use Flutter’s OutlinedButton which will create a beautiful texture around the button. Make sure you add the Goole logo asset to your asset library.
While creating the Flutter login page sample we are not focusing on backend functionality so you can leave the onPressed method empty. Here is the method to create Google Sign-In Button-
returnGoogleSignInButton() {
    return OutlinedButton(
      onPressed: () async {

        //You can implement it later
      },
      child: Padding(
        padding: EdgeInsets.fromLTRB(40, 10, 40, 10),
        child: Row(
          mainAxisSize: MainAxisSize.min,
          mainAxisAlignment: MainAxisAlignment.center,
          children: const <Widget>[
            Image(
                image: AssetImage("assets/google_logo.png"), height: 25.0),
            Padding(
              padding: EdgeInsets.only(left: 10),
              child: Text(
                'Sign-in to browse store',
                style: TextStyle(
                  fontSize: 16,
                  fontWeight: FontWeight.w500,
                  color: Colors.blueAccent,
                ),
              ),
            )
          ],
        ),
      ),
    );
  }
Now let’s look at our page –
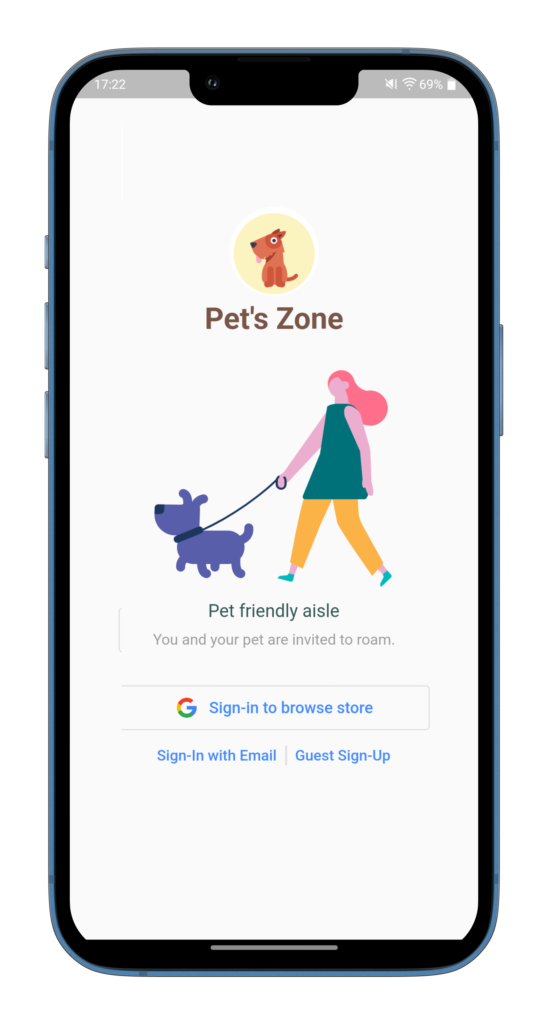
A good login page implementation must include email and guest sign-up options to cover users from different segments. Let’s implement the visuals of the other two sign-in buttons, Email sign-in and Guest sign-in (anonymous login).
In this method, we will create a row to contain these two TextButtons which will be wrapped in padding to look presentable and neat. Once again we will ignore the onPressed() methods because we are focusing on UI first.
returnOtherLoginOptionsButton() {
    return Padding(
      padding: const EdgeInsets.only(bottom: 20.0),
      child: Row(
        mainAxisAlignment: MainAxisAlignment.center,
        children: [
          TextButton(
              child: Text(
                "Sign-In with Email",
                style: TextStyle(
                    color: Colors.blueAccent,
                    fontWeight: FontWeight.w500,
                    fontSize: 15),
              ),
              onPressed: () {}
		  ),
          Container(
            width: 2,
            height: 20,
            color: Colors.grey[300],
          ),
          TextButton(
            child: Text(
              "Guest Sign-Up",
              style: TextStyle(
                  color: Colors.blueAccent,
                  fontWeight: FontWeight.w500,
                  fontSize: 15),
            ),
            onPressed: () {},
          ),
        ],
      ),
    );
  }
Similar to the previous TextButton we will create two TextButtons for Terms of use and Privacy policy along with a Text line heading.
In this method we will create a column that will contain the message, “By continuing, you agree to” and a row that will have the two buttons. Here is the method code-
returnTermsOfUseAndPrivacyPolicyButton() {
    return Padding(
        padding: EdgeInsets.only(top: 25),
        child: Column(
          children: [
            Text(
              "By continuing, you agree to",
              style: TextStyle(color: Colors.blueGrey, fontSize: 13),
            ),
            Row(
              mainAxisAlignment: MainAxisAlignment.center,
              children: [
                Container(
                  alignment: Alignment.center,
                  child: TextButton(
                    child: Text(
                      "Privacy Policy",
                      style: TextStyle(
                          color: Colors.blueGrey,
                          decoration: TextDecoration.underline,
                          fontSize: 12),
                    ),
                    onPressed: ()  {},
                  ),
                ),
                Container(
                  color: Colors.blueGrey,
                  width: 1,
                  height: 10,
                ),//A vertical divider between the two text buttons
                Container(
                  alignment: Alignment.center,
                  child: TextButton(
                    child: Text(
                      "Terms of Use",
                      style: TextStyle(
                          color: Colors.blueGrey,
                          decoration: TextDecoration.underline,
                          fontSize: 12),
                    ),
                    onPressed: () async {},
                  ),
                ),
              ],
            ),
          ],
        ));
  }
Here is the final beautiful Flutter login page sample which contains infographics of your pet store brand, Google sign-in option, email sign-up and Guest sign-up options, privacy policy & Terms of use options. Now it is ready to be used in your app-

In the next articles, we will be discussing how to create a flutter “login with email” page and also how to enable Google Sign-in, Email Sign-in, and Guest Sign-in. We will try to drop the link to the article here.
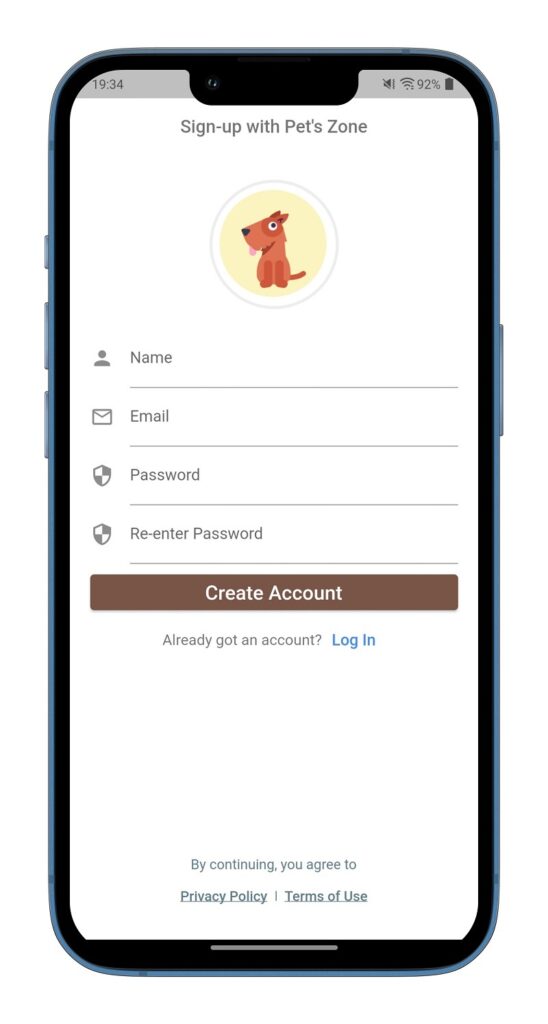
Read More: How to Create a Flutter Sign-Up Form page Like This 👇
Closing thought
Creating a Flutter login page is not an as easy task as it sounds. It is time taking and cumbersome process because this is the page where your user first lands and decides whether he wants to sign-up or skip. You should always be cautious and try not to overcomplicate things. A flutter login screen must be simple, neat, and in such a manner that even a dyslexic person should see what your app is about without facing many difficulties.
